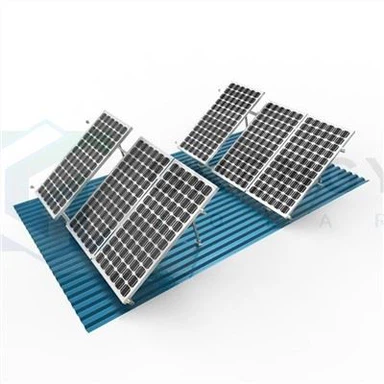


How To Mount Solar To Tile Roof
Jul 22, 2025
Installing solar panels on tile roofs combines sustainability with architectural elegance, but it requires careful planning to avoid damage and ensure optimal performance. This comprehensive guide covers everything from material selection to installation techniques, helping you achieve a seamless solar integration.
Why Tile Roofs Are Ideal for Solar Mounting
Tile roofs, renowned for their durability and classic aesthetics, are increasingly paired with solar systems. However, their unique structure demands specialized solutions:
Enhanced Durability: Tile roofs withstand extreme weather, aligning with solar systems' longevity
1
.
Aesthetic Harmony: Custom mounting systems preserve the roof's visual appeal.
Energy Efficiency: Strategic placement maximizes sunlight exposure, even on sloped surfaces
7
.
Key Components of a Tile Roof Solar Mounting System
1. Adjustable Mounting Brackets
Designed to clamp onto tile edges without drilling, preserving roof integrity
5
.
Compatible with clay, concrete, and terracotta tiles.
2. Waterproof Flashings
Silicone or rubber-based flashings seal gaps around mounting points, preventing leaks
6
.
3. Reinforced Rails
Aluminum or stainless steel rails provide stable support for panels, even in high-wind zones
4
.
4. Non-Penetrating Systems
Ballasted mounts use weights instead of roof penetrations, ideal for lightweight tiles
2
.
Step-by-Step Installation Process
Step 1: Assess Roof Compatibility
Roof Slope: Ensure the pitch is between 15°–45° for optimal energy capture
7
.
Tile Condition: Inspect for cracks or wear; replace damaged tiles before installation.
Step 2: Plan Panel Placement
Use solar pathfinders or software to identify sun-rich zones.
Avoid shading from chimneys, trees, or adjacent structures.
Step 3: Install Mounting Hardware
Bracket Positioning: Secure brackets to roof rafters using stainless steel screws.
Rail Assembly: Align rails with brackets and fasten with tamper-proof bolts.
Step 4: Secure Solar Panels
Use clamps compatible with your panel type (e.g., frameless or framed).
Ensure panels are evenly spaced to prevent stress on tiles.
Step 5: Waterproofing and Finishing
Apply flashing around all penetrations.
Install gutters or drip edges to manage runoff.
Common Challenges & Solutions
Challenge 1: Tile Damage During Installation
Solution: Use non-invasive clamps and protective pads to avoid scratches
5
.
Challenge 2: Wind Uplift
Solution: Reinforce mounting points with hurricane straps or adhesive anchors
4
.
Challenge 3: Condensation Buildup
Solution: Include ventilation channels in the mounting system to reduce moisture
6
.
SEO Optimization Strategies for Solar Roof Mounting Content
1. Keyword Targeting
Primary Keywords: "tile roof solar mounting," "solar panel installation on tile roof."
Long-Tail Keywords: "how to secure solar panels on tile roof," "best mounting systems for tile roofs."
2. On-Page SEO Techniques
TF-IDF Analysis: Balance terms like "waterproof flashing" and "non-penetrating brackets" to avoid repetition.
Header Tags: Use H2/H3 for subtopics (e.g., "Types of Tile Roof Mounts") to improve crawlability.
3. Content Structure
Internal Linking: Link to related articles (e.g., "Choosing Solar Tubes for Tile Roofs").
Visual Optimization: Add alt text like "adjustable solar tile hooks" to images.
4. User Engagement Metrics
CTR Optimization: Craft meta descriptions with keywords, e.g., "Learn expert techniques for installing solar panels on tile roofs."
Reduce Bounce Rate: Include downloadable checklists (e.g., "Tile Roof Solar Prep Guide").
Why Partner with Professionals?
Custom Solutions: Experts design systems tailored to your roof's slope and tile type
3
.
Warranty Coverage: Reputable installers offer 20+ year warranties on mounts and panels.
Local Compliance: Ensure adherence to building codes for wind/snow loads
4
.
Future-Proofing Your Solar Installation
Smart Mounting Upgrades: Integrate tilt-adjustable brackets for seasonal optimization.
Battery Integration: Pair with solar storage to maximize energy independence.