How To Install Solar Panel Mounting Brackets
Jul 29, 2025
Installing solar panel mounting brackets is a critical step in ensuring the stability, durability, and performance of your solar energy system. Whether you're working on a tile roof, metal roof, or ground-mounted setup, proper bracket installation guarantees safety and optimal energy harvest. This comprehensive guide covers everything from tool preparation to final adjustments, helping you achieve a professional-grade installation.
Why Solar Panel Mounting Brackets Matter
Mounting brackets are the backbone of any solar installation. They secure panels to roofs or ground structures, withstand extreme weather, and optimize sunlight exposure. Key benefits include:
Enhanced Durability: High-quality brackets resist corrosion, wind uplift, and snow accumulation.
Energy Efficiency: Proper alignment maximizes sunlight capture, boosting energy production.
Safety Assurance: Secure brackets prevent panels from shifting or detaching during storms.
Types of Solar Panel Mounting Brackets
Choosing the right bracket depends on your roof type and energy goals:
Roof-Mounted Brackets
Flush Mounts: Ideal for asphalt shingles, blending seamlessly with the roofline.
Tilt Mounts: Adjustable angles for optimized sunlight exposure on sloped roofs.
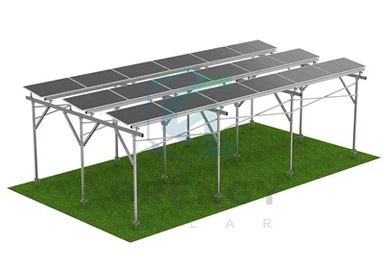
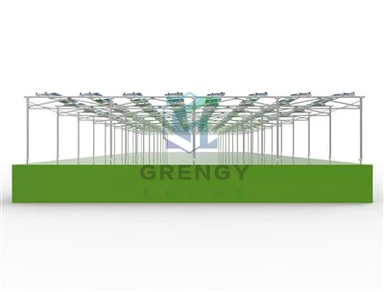
Ground-Mounted Brackets
Fixed Poles: Stable for large solar arrays in open fields.
Ballasted Systems: Weighted bases eliminate roof penetrations on flat surfaces.
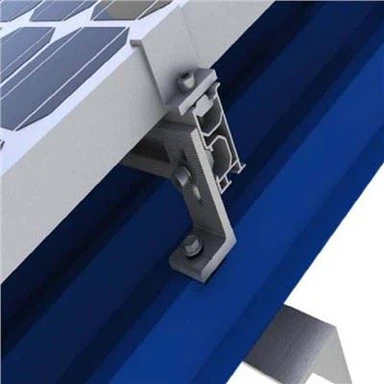
Rail-Based vs. Railless Systems
Rail-based brackets use aluminum rails for added stability.
Railless systems clamp directly to surfaces, reducing material costs.
Step-by-Step Installation Process
Step 1: Assess Roof Compatibility
Roof Type: Check if your roof is tile, metal, asphalt, or flat. Each material requires specific brackets.
Structural Integrity: Ensure rafters can support the combined weight of panels and brackets.
Slope Measurement: Use a level to confirm the roof pitch (e.g., 15°–45° for optimal tilt).
Step 2: Plan Panel Layout
Sun Path Analysis: Use solar pathfinders or software to identify the sun's trajectory.
Spacing: Optimize row spacing to prevent shading and maximize coverage.
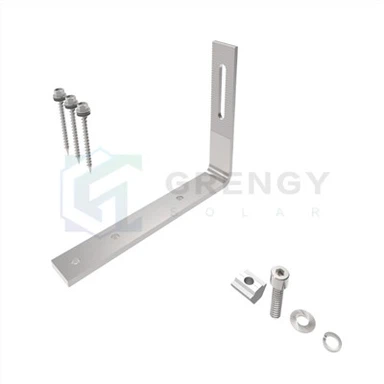
Step 3: Install Mounting Hardware
Bracket Positioning: Mark locations on rafters or roof beams. For tile roofs, avoid drilling tiles-use clamps or adhesive anchors.
Rail Assembly: Align rails with brackets and secure using tamper-proof bolts.
Waterproof Flashings: Seal gaps around brackets to prevent leaks.
Step 4: Secure Solar Panels
Clamp Installation: Attach mid and end clamps to rails, ensuring panels are evenly spaced.
Leveling Check: Use a bubble level to confirm panels are straight and secure.
Step 5: Final Adjustments and Testing
Tilt Optimization: Adjust brackets seasonally for maximum sunlight capture.
Electrical Safety: Inspect wiring and connections for stability.
Common Challenges & Solutions
Challenge 1: Tile Roof Damage
Solution: Use non-invasive clamps that clamp onto tile edges without drilling.
Challenge 2: Wind Resistance
Solution: Reinforce brackets with hurricane straps and ensure ballast weights meet local codes.
Challenge 3: Corrosion
Solution: Opt for stainless steel or galvanized brackets in coastal or humid areas.
Why Partner with Professionals?
Custom Solutions: Experts design systems tailored to your roof's slope and material.
Warranty Coverage: Reputable installers offer 20+ year warranties on mounts and panels.
Local Compliance: Ensure adherence to building codes for wind/snow loads.
Future-Proofing Your Solar Installation
Smart Mounting Upgrades: Integrate tilt-adjustable brackets for seasonal optimization.
Battery Integration: Pair with solar storage to maximize energy independence.