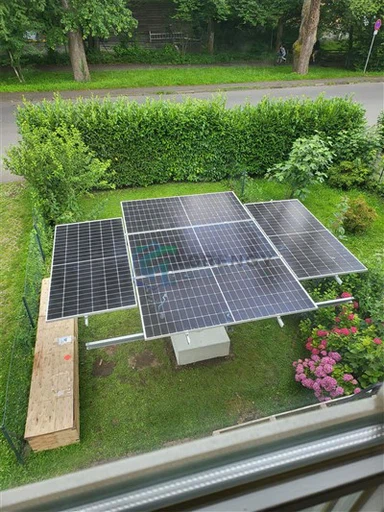
Pile Ramming Solar Mounting System Structure
Material: Aluminum 6005-T5 & HDG or ZAM Steel
Max Wind Load: According to the projects request
Max Snow Load: According to the projects request
Solar Module Orientation: Portrait or Landscape
Application:Ground or Farm
Pre-assembled parts at the factory, fast and easy to install
OEM & Sample: Available
- Fast Delivery
- Quality Assurance
- 24/7 Customer Service
Product Introduction
Quality: We use top materials and precision-engineer our solar racks.
Expertise: Our veteran team has a proven track record in installations.
Customization: Tailor racks to your unique project needs.
Support: Offer pre- and post-sales help.
Cost: Ensure long-term savings with quality products.
Cost savings
Save your money with our logistics service taking advantage of quickly delivery.
Various services
Bespoke Solutions
Proven Experience
Thousands of happy clients,hundreds of permanent customers are the result of our work.
Quality products
Our products have reached the international quality standards,
Technical Support
In the after-sales service,we provide technical services.
Free Samples
If you have a product in mind,please let us know and for the
For more details, pls email:vivian@grengysolar.com
the Installation process of Pile Ramming Solar Mounting System structure
3.1 Bracket Assembly
Assemble the steel brackets on the ground according to the design drawings. This may involve welding or bolting together different parts of the bracket. Ensure that the assembled brackets have the correct shape and size. Check the connection points to make sure they are firm.
3.2 Bracket Connection to Piles
Lift the assembled brackets and connect them to the piles using high - strength bolts. Follow the torque requirements specified in the installation manual when tightening the bolts. This ensures a secure connection between the brackets and the piles, capable of withstanding the mechanical stress during the operation of the solar mounting system.
Adjust the position and angle of the brackets to ensure that they are in the correct orientation for the installation of the solar panels. This may involve using adjustment bolts or shims to fine - tune the position.
4.1 Panel Lifting and Placement
Lift the solar panels carefully using a crane or other lifting equipment. Place the panels on the installed brackets. Take care not to scratch or damage the panels during the lifting and placement process.
4.2 Panel Fixing
Secure the solar panels to the brackets using the provided fixing clamps or bolts. Ensure that the panels are firmly fixed to prevent them from being displaced by wind or other external forces. Check the tightness of the fixing components regularly during the installation process.
4.3 Electrical Connection
Connect the electrical wires between the solar panels according to the electrical design. Use waterproof connectors to ensure the reliability of the electrical connection in outdoor environments. After the connection, conduct a preliminary electrical test to check for any open - circuit or short - circuit problems.


Hot Tags: pile ramming solar mounting system structure, suppliers, factory, customized, custom, buy, Single Pole Mounting System, Single Row Solar Mounting System